For many small or informal events, using event registration software can be overkill.
As a 3rd party agency, we often get asked if there is a free, easy-to-build form to capture vital attendee information that isn’t covered in 3rd party branding.
Our answer is Google Forms. We’ll show you how to quickly build your own custom form, methods for sending it out, professional add-on recommendations, and how to manage responses!
Google Forms for Event Registration
Google Forms are great for event registration because of how easy it is to build-out out fields and send out your invite quickly.
Additionally, you can customize the look and feel of the form to match your current branding style using the standard design options, or leverage professional add-ons that give you the ability to create custom designs.
The downside of Google Forms for event registration is also it’s strength: it’s simplicity.
Simple to use also means limitations in terms of functionality and design. But as mentioned, with the available add-ons, you can get much more out of your form.
Locating Google Forms
First, go to your Google Drive area.
If you are unsure of how to open your Google Drive, open a new tab in your Chrome Browser and click on the Google Apps icon that’s located in the top right of the screen.
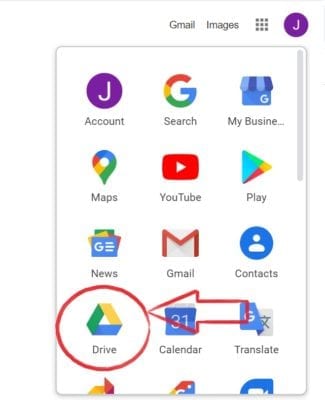
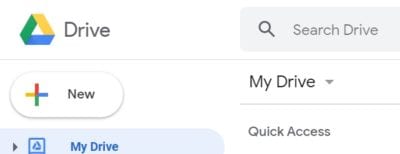
After you’ve selected Google Drive, click “New” in the top left corner, and then finally “Google Forms”.
Building Out Your Form
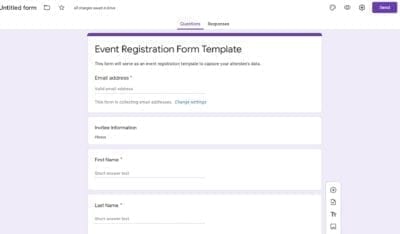
Once your form is open, editing the information is fairly straightforward.
Click into fields such as ‘Title’, ‘Description’, and each individual questions to assign a label.
For questions, you can select several different response types, including all of the standard options you might expect and even a file upload option.
Keep adding (or cloning) questions until your Form is complete. Add an additional section if you’d like.
Additional sections are great way to delineate your questions, i.e. if you want attendees to complete a specific set of questions before proceeding to the rest.
Finally, you have an option to add a photo or video to each question.
Designing
The design options are fairly limited with Google Forms, but this also means that it won’t take long to wrap it up and send it out.
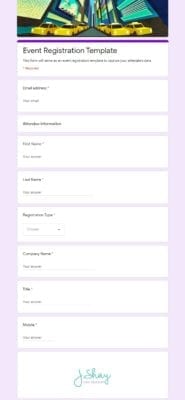
For our cover picture, we used one of the generic photos offered by Google. When you build your own form or edit our template you should use the venue’s photo.
Additionally, you can choose a single theme color, font type, and background color.
Here is a form that we built and designed in <5 minutes!
Optional Form Add-ons
If you really want to step up your registration game, you should check out some of these add-ons that will give your form a more professional look and feel.
Some examples include:
- SurveyMonkey (Post-event surveys)
- Publish your response data into Google Sheets for analysis
- Create custom email notifications
- Create custom designs and embed into your form
Options for Sending
Now that you’ve built and designed your form, there are a few options for sending:
- Shareable link
- Embedding into a website (our favorite)
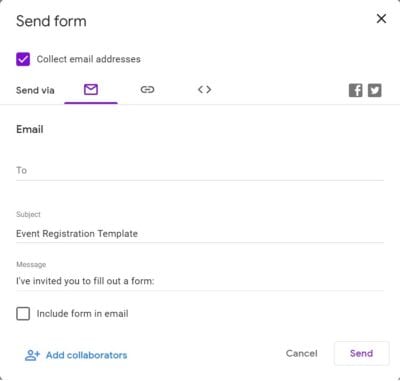
If you aren’t using an add-on to send out custom email notifications, be aware that the standard email option is fairly limited in how attendees will see it. Definitely test this before sending it out so there are no surprises.
The shareable link can be used if you are sending out custom invites – We highly recommend using the URL shortener option that’s presented.
Lastly, the HTML code is an awesome option if you have a webpage associated with your event, and the ability to embed HTML.
Managing Responses
Managing responses is also a breeze.
At the top of your form, click on ‘Responses’.
Next, click on the green Google Forms icon. You are given the option to either select an existing spreadsheet (residing in Google Drive) or to create a new spreadsheet.
I choose to create a new spreadsheet and Google presented a spreadsheet with pre-populated cells based on the field labels I had already input into my form.
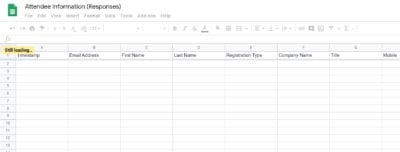
From here I can export the data as I would with any Google sheet.
The Wrap
Google Forms can be a very powerful tool for many of your events.
If your needs are simple, a free form can be created within a matter of 5 minutes or less! You can’t say the same about event management software.
Having said that, we strongly recommend you still use event management software for large, formal, or customer-facing events where a professional experience is required for the attendee, and robust data-capture is required for your team.
Let us know what you think. How did your form turn out? Email us info@jshay.events